

Menu and wine glass by soyculto, on Flickr
When last we spoke, we changed the HTML in our little sample file that Jesse gave us to reflect the title we put in our WordPress settings. We have a few more things we need to play with before we get into the heart of our new theme.
Stylin’
It’s important to know that every modern HTML file keeps all of its style declarations (things like colours, fonts, menu styles, etc.) in a file called style.css. The purpose of this style file is to centralise all of these things in one file, so we aren’t editing hundreds of files every time we want to change the background on our entire site. A classic HTML style call looks like this:
<link rel=”stylesheet” type=”text/css” href=”style.css”>
If we leave this in, then every time somebody wants to use our theme they would need our specific stylesheet file. Obviously not a good idea – we want WordPress to make a local file for every upload of our theme. So we put in a PHP call:
<link rel=”stylesheet” type=”text/css” href=”<?php bloginfo( ‘stylesheet_url’); ?>”>
This will get the information for the stylesheet from our WP settings instead of hard-wired into our file.
The Header
The next section in our little file looks like this:
<header>
<h1>Jesse Friedman | Developer</h1>
<nav>
<ul>
<li><a href=””>Home</a></li>
<li><a href=””>About Us</a></li>
<li><a href=””>Services</a></li>
<li><a href=””>Portfolio</a></li>
<li><a href=””>Contact Us</a></li>
</ul>
</nav>
</header>
Just to translate that into English, it’s the header for our page (so the first headline, which we call <h1> because it’s the biggest font we have). Then we have a navigation menu, with a list of links. We have the names of the links (Home, About Us, etc.), and also a place to put the URLs for the links. In classic HTML, we would type in the actual URLs for each link, and every time one of those links changed, we’d have to go in and edit the file to change it. Not fun, so of course we are going to change these to dynamic PHP calls, allowing WordPress to do all the work for us.
Not surprisingly, changing the name in the headline looks like this:
<h1><?php bloginfo(‘name’); ?> | <?php bloginfo (‘description’); ?></h1>
Being the modest person I am, this is what WordPress echoed when I ran this on my WAMP:
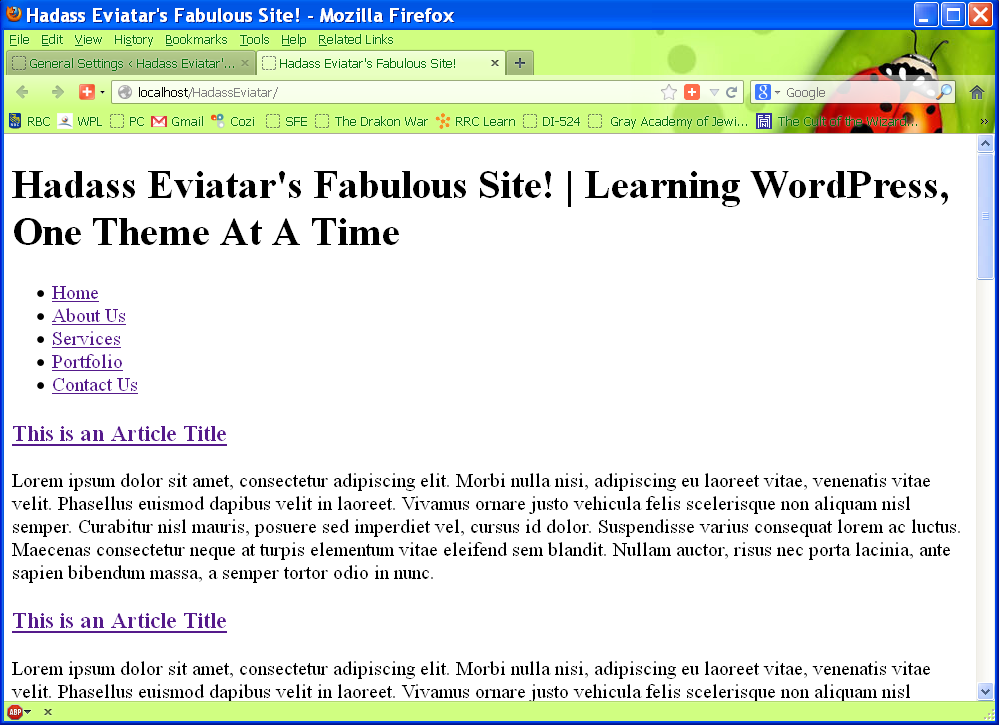
Remember you can click on the picture to see it in a bigger size.
Menus
The last thing we are going to do in this post is turn on the menus – we don’t want static links here, we want to be able to change and add our menus on the fly. This is a little trickier than just changing a name. We need to make a special file to contain functions like menus that can contain layers within layers (although we won’t see most of those layers, don’t worry). We call it functions.php, and we need to put it in the same directory as the index.php and style.css files. We will put the following code into this file:
<?php register_nav_menus(); ?>
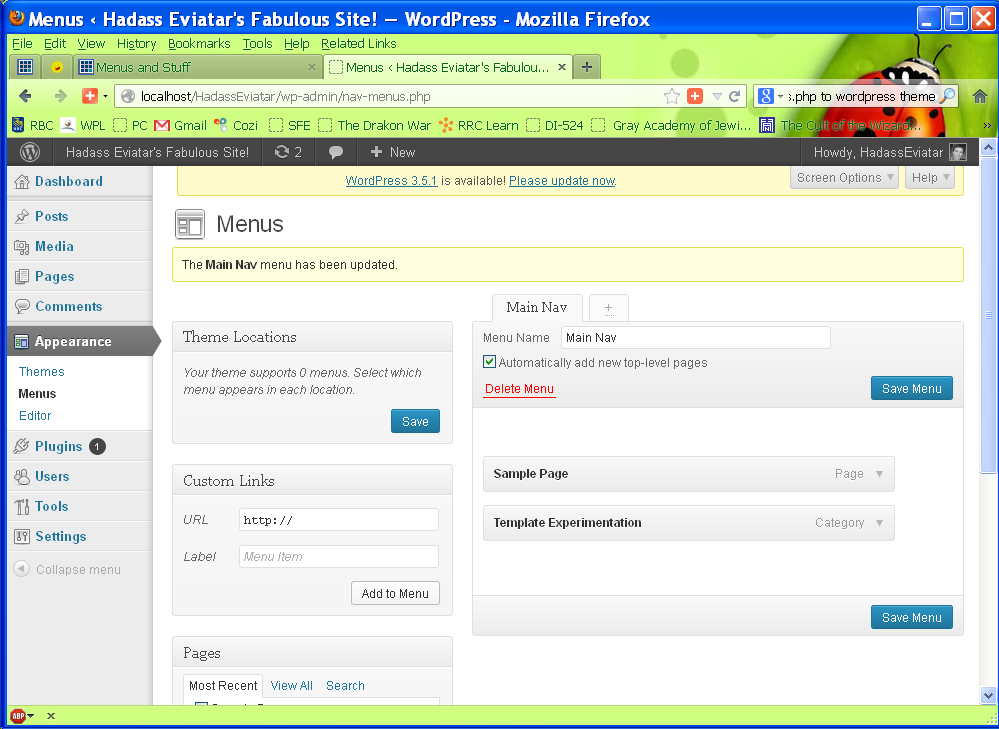
This is very cool – once we’ve done this, suddenly we have menus in the Appearance section of our Dashboard. Remember you need to upload the file – in WAMP I just added it to the zip file, uploaded and activated the theme again, and there it was. I went into the Menu section and created a menu called “Main Nav”. Now I can put a call to my main navigation menu into the place where all those navigation links were, and every time I change a setting, the menu calls will change, without my doing any editing at all. Remember you can click on pretty much any picture in this post to see it in a larger format.
Now to finish up this section of Jesse’s book (affiliate link), I’m going to show you how to make the actual call to have a dynamic navigation menu.
We need to edit our index.php file and replace all those static links with one dynamic call to the main navigation menu. Don’t worry about not understanding the calls, just put them in for now.
<header>
<h1><?php bloginfo(‘name’); ?> | <?php bloginfo(‘description’) ?></h1>
<nav>
<ul>
<?php wp_nav_menu(array(‘menu’ => ‘Main Nav’)); ?>
</ul>
</nav>
</header>
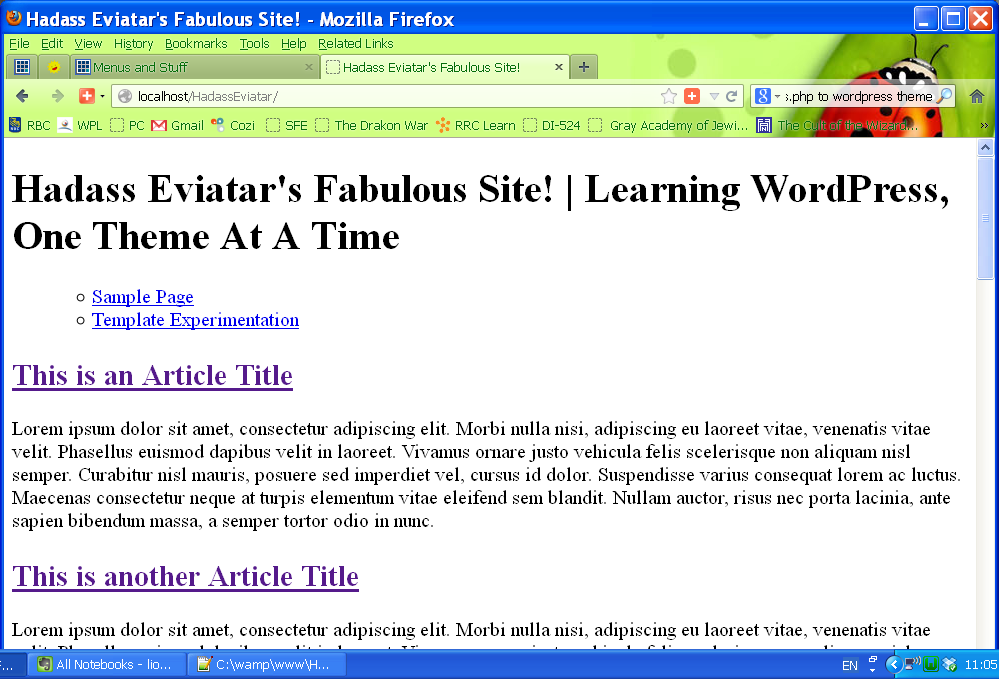
I’d put some random pages in my menu, and now it looks like this:
Next post I’m going to throw you for The Loop! In other words, we will learn how to loop through our articles instead of painfully putting them all on the page, one after the other. It’s one of the great things about WordPress.
If you’re still with me, let me know if you have any questions or comments!